Thursday, September 12, 2013

My new project : HJ Alien FPV Quadcopter

Hello dear friends…
I don’t know if all rc heli fliers end up flying FPV multirotors or not, but it seems maybe as the next step in the hobby ?
Don’t know the answer, but I know that since I assembled my 450 heli, I tried to hang my smartphone to the landing skids and try filming the flight:)
Later on, after getting my Walkera Ladybird V.1, I was surprised on how easy an indoor hover is compared to a 6 channel genius cp, which is anyway a  very stable and smooth heli…I think that then, I had the “click” and decided on building a new quadcopter, a 450 size one, against my wife’s opposition
If you are into the quadcopters (or multirotors) already, maybe this info is not useful for you, but if you’re a newbie like me, figuring out all the pieces of this puzzle, then I hope that this info is useful to you…

So, it should all start, like any other project with your requirements: what should your new multirotor do? (quadcopter in my case?)
If you need a heavy lift platform to carry a heavy D-slr camera, then a hexa(6) or even a octo(8) platform is needed.

This is the list of parts I used in my quad project:
-frame : HJ MWC x-mode alien quadcopter 
-FC : the Crius All In One Pro V.20
-bluetooth : FC Bluetooth module
-Gps : - N-06 GPS receiver v.2.0
-UBEC : I choose to use and UBEC for powering the FC, I got this 3A one from here since the 5A version had much higher voltages then specifications;
-ESC : Hobbywing Pentium 30A ESC for quadcopter
-motors : Sunnysky x2212 KV980
-propellers:orange in the back same like my ladybird, hopefully will help my orientations;
-power : XT60- to 4 x ESC cables , instead of the power board used in standard quad designs, this is an direct spliced cable to power the ESC’s;
-various : foam sponge for FC mounting, white/red led stripes and spacers/stand-offs 
Off course, I already had 3S 2200 mAh batteries and balancing charger, a walkera RX-1002 receiver and my Devo 10 transmitter.

In my case a 4 motors(quadcopter) will fit my bill, and if needed able to carry a small camera for DVR purposes(maybe the 808 #16 V2), but also not be very expensive to repair a crash.
There are many quad frames from more or less famous brands, but I choose the HJ 450 alien or locust/flycat/alien or whatever name it might have frame. What’s special about it is that is not symmetrical like the typical 450 frame, but it’s longer and can fit a camera gimbal in the front and the battery on the back to compensate for the weight. Also the front arms are spaced, so that the front blades don’t show up in the field of the camera. I also liked that it has a lot of fixing points and gives you more options to install later add-ons.
Moving on, the main component or the “heart” of the quad is the FC or flight controller. Again, based on your target budget you can choose several types, but the most popular one’s in terms of software used would be the MultiWii and the Megapirate versions. You can search more about each one of these great open source projects in the links. Considering the price vs. features, my choise was the Crius AIOP(All In One Pro) V2.0 flight controller from the RCtimer site. It has all the nice features that more expensive FC’s have but comes to a under 60 usd price tag. Together with it I ordered the N-06 V2.0 GPS module and the FC Bluetooth module for Android.
Since the FC is quite sensitive to powering voltage, I choose to use an UBEC that provides a 5V with maximum 3A current only for the board.
I also have FPV equipment, 5.8Ghz tx/rx, and a SONY 600 VTL cam.
Anyway I will add the FPV stuff only after setting up the quad fully, and getting used to it, since now I can practice only with my Ladybird V1 micro quad…

Now, let’s get to the funny part, where actually I put the “bits and pieces” of this puzzle together to create a new flying machine J

I will structure the build in x main categories :
1.     FRAME
2.     MOTORS & ESC
3.     FC and related connections
4.     Gps and related
5.     Later add-ons
6.     CRIUS AIOP tuning, and my working setups
7.     FPV gear


Please stay tuned for the following parts and enjoy the overview of all the parts I got for this challenging build...

Sunday, September 8, 2013

Is our hobby really SAFE ?

Hello again dear friends,
I didn't planned to write these lines now, but I read about a tragedy that happened this week, on Thursday, when a fellow RC pilot, named Roman Pirozek Jr. was killed by his own Rc helicopter during a flight in a public park in New York city(Calvert Vaux Park in Gravesend, Brooklyn)...I was thinking maybe daily about what could happen during flying, and this thought is hiding all the time in the back of my mind, troubling me...


My honest and sincere condoleances to the mourning family, and as a parent myself, I can't think of something worse on this world than seeing your child die before your eyes...But now, even if maybe some of you will argue about this and disagree,  I would not fly anything bigger than a 450 class in a public park, assuming there are no people nearby...Bigger birds( and I assume he flew one) should not be flown in other places that flying fields, to minimize the risks on public...Just imagine that the heli could have fallen on someone just having a walk with his family in the park...This thought is just real...Again, these things are NOT TOYS...They can be deadly...To be honest, I think also a 450 size heli carbon blade at 100% RPM could easily cut your throat open, leading to certain death...
So, just hoping that the following compilation of personal safety rules could help avoiding a tragedy or any type of rc heli accident, I will just lie down a summary of the rules I use when flying my helis:

  1. Always connect transmitter first and helicopter second;
  2. Always, I mean ALWAYS, use Throttle Hold(TH) whenever you don't plan to take off, but the battery has to be plugged in;
  3. Always hit TH and then remove the battery no matter what;
  4. If you loose the heli and there's no way to recover, hit TH ASAP;
  5. If you fly a flybarless heli, always tilt the heli and check for the FBL compensations before taking off;
  6. Always land ASAP if you see or feel something is "not right" or you hear any strange noise;
  7. Regularly maintain your heli, and lubricate whatever needs that to be done;
  8. Don't fly the heli over your head, you could loose orientation easily;
  9. Don't fly when you are too tired, you need to be very focused when flying;
  10. Don't fly when you have any alcohol in your blood, again focus is key when flying;
  11. Always try to have someone with you(behind you) in case something bad happens he/she can call for help asap;
  12. Don't fly when friends are around, you could push your limits "to impress" and you can make mistakes;
  13. Don't push your limits when flying, take normal steps and only when you master it, move on;
  14. Always take your time to check the sequence of steps before a flight, sometimes you're rushed to see the heli in the air and forget important things;
  15. Maybe the most important rule of all : NEVER FLY OVER PEOPLE or near them....
I am sure some of you have their own lists, and you are welcome to share them here via the comments section...
We all enjoy flying and sometimes just disregard the risks we take, and unfortunately people need to die so that we open our eyes and realize that this hobby is fun but can be also deadly...
Please be responsible and please consider the safety of other people nearby and yourself also...

Life can be beautiful...Let's not waste it...
You can see the full article posted by the nydailynews here

Rest in peace Roman Pirozek Jr. and let's try and stop this count by being more responsible

Wednesday, September 4, 2013

Sony 600 TVL FPV camera

Hello,
Like many of you, I was looking to get a camera for my FPV quadcopter, and based on too many good reviews to ignore, I decided to go with the Sony 600 TVL.

Camera with additional metal case, PCB OSD and OSD manual
The camera comes like you can see in the below unboxing video with the separated OSD PCB board and you can connect it when needed, adjust whatever settings you need, and then simply unplug. Since currently I live in S. Korea, the seller automatically choose the NTSC camera, but after contacting them, they sent  another PAL camera that I will need back home in Europe.
Another “good thing” that came out of this wrong spec camera being sent to me is that I got  the first camera with the 2.8 mm lens, and for the second one I choose the 3.6mm lens, so after I will set it up, I will have two lens to choose from.
My camera comes with the metal case, already mounted, and since the PCB is not so crash resistant, I suggest getting it also…
Please check below the unboxing movie, and I will come back with more details during my quadcopter build.

Here is the unboxing and short presentation of the camera:

Saturday, August 17, 2013

Walkera Master CP Metal Swashplate

Hello Friends
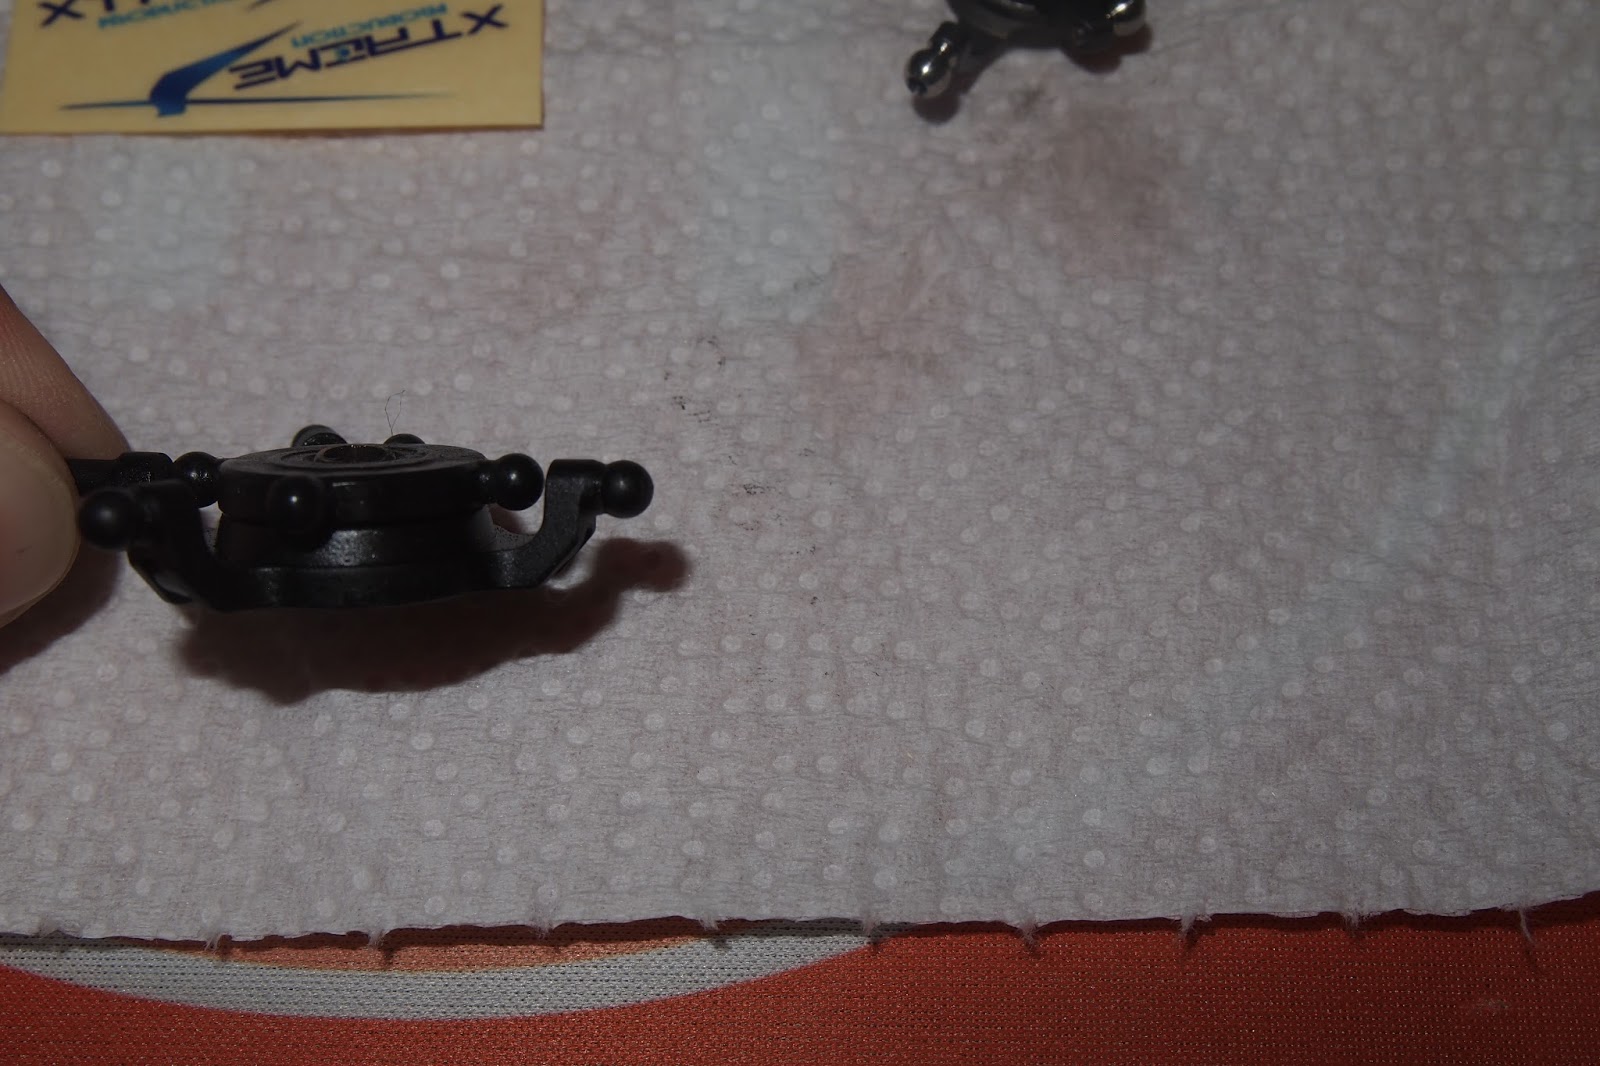
Since I really like my little flying tank, I thought of an small up-grade...Since the plastic stock swashplate developed quite a big slop, I considered a metal up-grade version from X-treme Production...I put some pictures of both old and new, and by flying a bit with the new swash, I feel the heli reacting a bit faster and feeling a bit more "locked" in...You can find the part on miracle mart website that sent it to me for a small review, here. I think a more interesting up-grade, would be their combo that they also sell, but at the time of this post, it was out of stock, here.

Side by side: left-metal version/right plastic version

Underside view

Profile view - metal swashplate

Profile view - standard swashplate

Stock swashplate has 3.2 grams

Metal swashplate has 3.6 grams

Finally installed on the heli

Now, hopefully my budget will allow for the addition of more metal parts in my Master CP, and later on I will have to see how the metal absorbs shocks in the eventuality of harder touchdowns compared to the stock plastic...
But you  can't have it all, can you ? :)
What up-grades do you guys have on your Master CP's ?
Let's share this info, and maybe consider these also...
Take care and happy flying :)

Wednesday, July 3, 2013

My new Walkera Ladybird quad

 
The backside of the box


Hmmm, why would I need a micro quad? I asked myself not long time ago…
The obvious answer was: I don’t need one, especially this small, right ?
Actually since my Devo 10 tx passed away with no reason, I was looking for a new TX, but then
a Devo10 deal bundled with the Ladybird caught my eye on RC711.com.
I only fly helis, so getting this quad should be an interesting experience…
So, I started reading about the ladybirds or ladybugs on the net, and I realized there are two versions of it…
-version 1, which is the one I got is the original bug with telemetry 6 axis gyro and up-gradable firmware;
-version 2, is the cheaper one with 3 axis, no telemetry and no up-gradable firmware.
I guess Walkera released V2 as a response to the huge number of Chinese ladybird clones starting to pop-up in the market and their main goal was price reduction in order to re-gain the lost territory.
What can I say about the Ladybird ?
I was surprised how stable my Genius Cp V2 was, but the bug is even more stable and unlike helis, you don’t need constant aileron/elevator correction to keep it leveled, this thing just hovers nicely…
Of course, you could use it to improve your orientations on your helis, but orientations only, since flying is totally different and I think the learning from quads cannot really be implemented on helis, as per se.
Since I already have some batts for my GCPV2 I am able to use it on the bug and reduce the downtime needed for recharging. I want to suggest you should leave it a couple of minutes between batteries to cool off the motors, since this was probably the reason my GCPV2 motor passed out. This is the bad thing about brushed motors, but I guess it was the only way to keep it simple.
So, please check the various sides and angles picture for your reference below:

The box

The bird came with 240mAh batt, you can use as size reference

Rear view

Left side

Right side

The "belly"

Canopy off

Closer look inside


Receiver board and the firmware update connectors

Weight without battery

Battery weight (240 mAh)

Canopy weight

Ready to fly weight
Also, you can check my unboxing movie and the really first time flight below:

What I liked :
-ultra stable
-small sized
-due to size it’s safer to fly indoor;
-my daughter loves the red ladybug canopy which is a plus on design;
-climb rate and forward speed are surprisingly fast for the size;

What I didn’t liked
-not really a dislike, but I think the motor booms can break easily during crashes/need to check if a micro heli landing skid will do ?
-my throttle stick on the Devo 10 was very stiff, but that's also not a complain for the bird

Now that I was innoculated with the multirotors bug, maybe a bigger one will be next?
p.s. hope my wife doesn't read this post :) 

 
Related Posts Plugin for WordPress, Blogger...